
 Tweet
Tweet
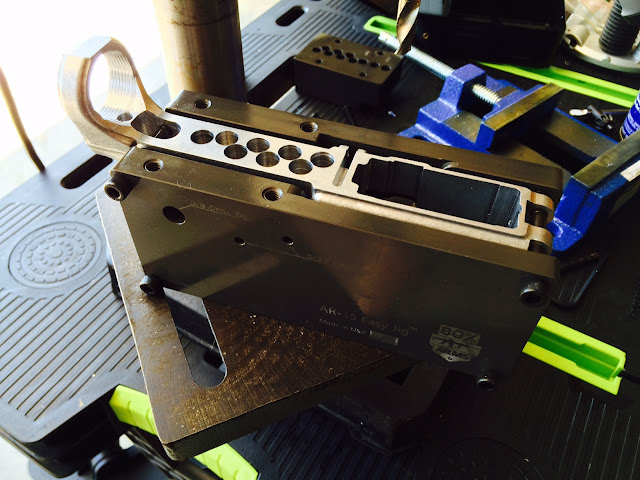
Finished my first 80% lower with my 80% arms Easy Jig. I had read everything there was to read and watched every available video about using the Easy Jig that was available on the internet and I was pretty confident I knew exactly what to expect. Even with all of the book learning nothing beats good old fashioned experience in doing something to really learn how to do it. I got my easy jig, the 80% arms 3/4" length of cut 1/4" end mill, my set of drill bits out of my tool box, and a 3 pack of Tactical Machining forged 7075 80% lowers. I highly recommend getting the 80% arms end mill. I looked everywhere for a cheaper alternative, and it's not worth trying to save $4-5. Their end mill works well and you don't have to worry about milling into your jig. Get it, it's worth it.
Starting off with the drilling which should have been the most straight forward and easy part of the process. My handy chart said to use a drill speed of between 2k-3kRPM for aluminum with a 3/8" drill bit. I originally went with 2180 RPM setting on my old Delta 8" benchtop drill press. It's a good 15 years old but looks almost exactly like the current el cheapo 8" benchtop drill press from harbor freight. With a jobbers length 3/8" bit (~5" long) I could not fit the jig on the table and slide it under the bit. Moving the table out of the way my drill press didn't have enough throw to drill the holes deep enough. To get around this I had to move the table out of the way, pick the jig up sliding the drill bit into the hole I want to drill, and slide the table back under the jig. Didn't take too long to realize my little drill press didn't quite have the omph even at 2180 RPM the drill press was noticeably bogging down even with proper lubrication and pecking. I dropped the RPMs to 1630 which slowed my drilling down a bit and the drill press performed much better at those speeds. Good machining practice keeping the chips clear and keeping the drill bit lubed and checking my drill stop collar frequently for slippage found all of the holes drilled in less than 30 minutes and that was taking it slow.
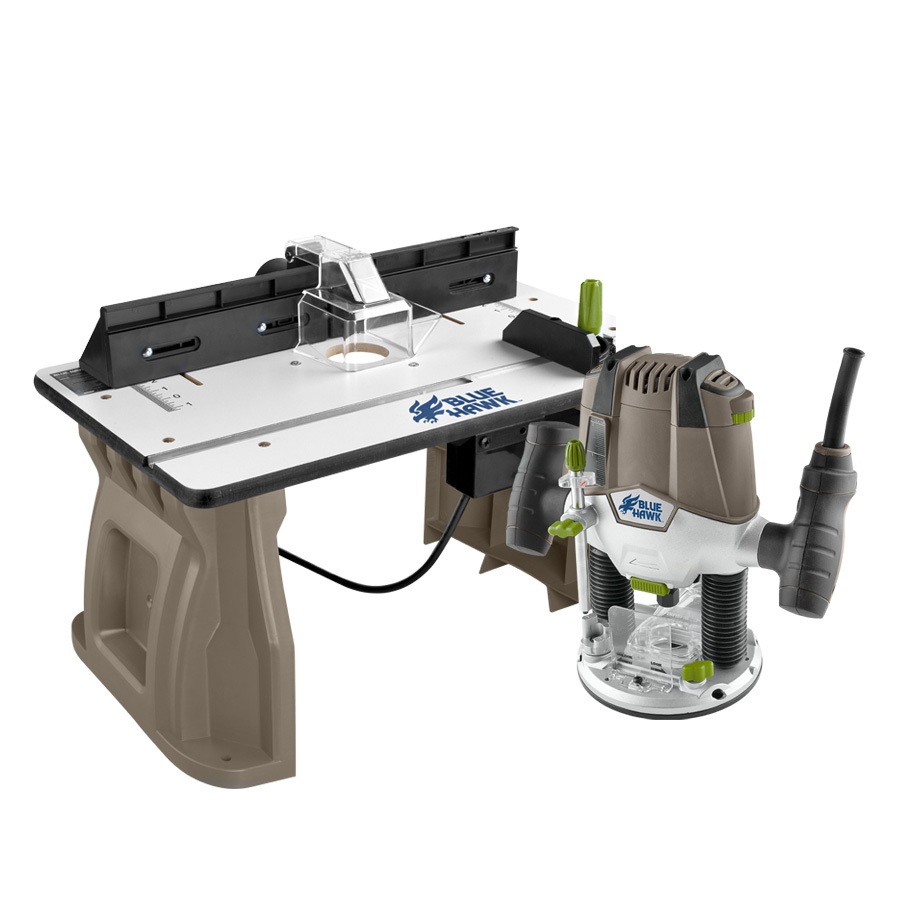
Next came the milling. I had a Blue Hawk (Lowes Brand) el cheapo plunge router that I had bought for $79 *with a router table* for another project. $79 with a router table? Yeah it's a cheap PoS It looks a lot like the Black and Decker RP250 that 80% arms does not recommend. I'm sure they came out of the same Chinese factory rebadged for Lowes. I figured I would give it a shot and see if it would work. If not I would invest in another router.
Don't the look suspiciously alike?

I made a couple of mistakes in the beginning but after about half way through my first lower I found my groove and got into a rhythm. In no particular order, my main mistakes were:
1. Trying to remove too much material. In my excitement of wanting to get this done the first couple of passes I tried to remove "1/3" of the hash mark. I was getting a lot of chatter with that depth of cut. I tried adjusting the router speed up and down but was still getting chatter. 80% arms says to do 1/4 to 1/5 a hash mark per pass. This leads me directly to item number 2.
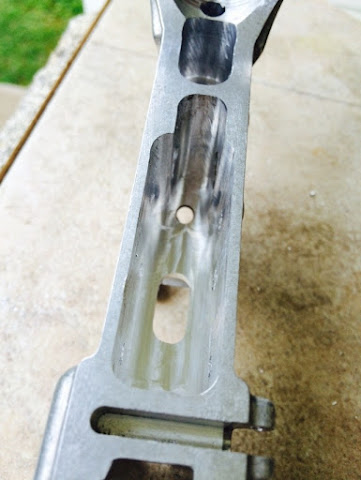
2. Not using the depth adjustment/measurement tools on my router for a more consistent depth change from pass to pass. Trying to use the included cutting gauge that is built into the jig was pretty difficult when using a plunge router. Trying to hold the gauge pushing down on the plunger to get the depth set consistently... well that was a very inconsistent operation. After a couple of passes I finally wised up, abandoned the depth gauge build into the jig to adjust my cutting depth using it only for periodic sanity checks and started using the depth controls built into my router. I found I could get a really smooth cut when I cut at a depth of 3/64" or less. I found I could actually cut faster using the shallower cut because I didn't have to be as slow or steady when making the pass.
Walls get smoother as I go down the lower.

3. Not cleaning my collet or tightening my collet tight enough. My router has been used on wood projects and has bits of wood dust all over it. I should have cleaned the collet out before I started but I just jammed the end mill (backed it off about 1/4") and started milling. About half way through my 2nd pass the router was really starting to jump a lot. I futzed with the speed (RPMs and the speed I was moving the router) but it was only getting worse and worse. After I finished that pass that's when I noticed my bit had backed out almost 1/4". Then I vacuumed the collet out, blew compressed air in there, and swabbed it with some alcohol soaked Q-tips to pick up all of the fine wood dust. I tightened the crap out of it and didn't have any issues after that.
After bottoming my router on the jig's depth guide I thought I was done. Well it turns out I wasn't.
Jig is bottom out! I'm done!

Wait... it looks like I'm a 32nd out from the 1.249" number. That's not within the 1.249" +/- 0.01" tolerance.

Breaking out the calipers verifies that I'm still outside of tolerance.

I took two more really light ~1/64" passes to sneak up on the 1.249".
Since my lower came with the rear take take down area already milled I didn't bother removing the material between the fire control pocket and the rear take down shelf.
After reading a lot of horror stories on milling out the trigger hole I read over on another site several people having success milling the trigger hole using a different method than the one listed in the instructions for the easy jig. User JAE on the site suggested not drilling the hole for the trigger slot. Instead he bottomed the mill out on the bottom of the lower. Then lowered the end mill just a hair, I did it in 1/64" steps. Then you rest one edge of the router on the work surface and tilt the router down to begin your cutting pass. After tilting the router down your make your pass. It took me 5 passes this way and I ended up with a very clean trigger pocket. I haven't tried it any other way but this way was very easy and made a very nice clean trigger pocket.
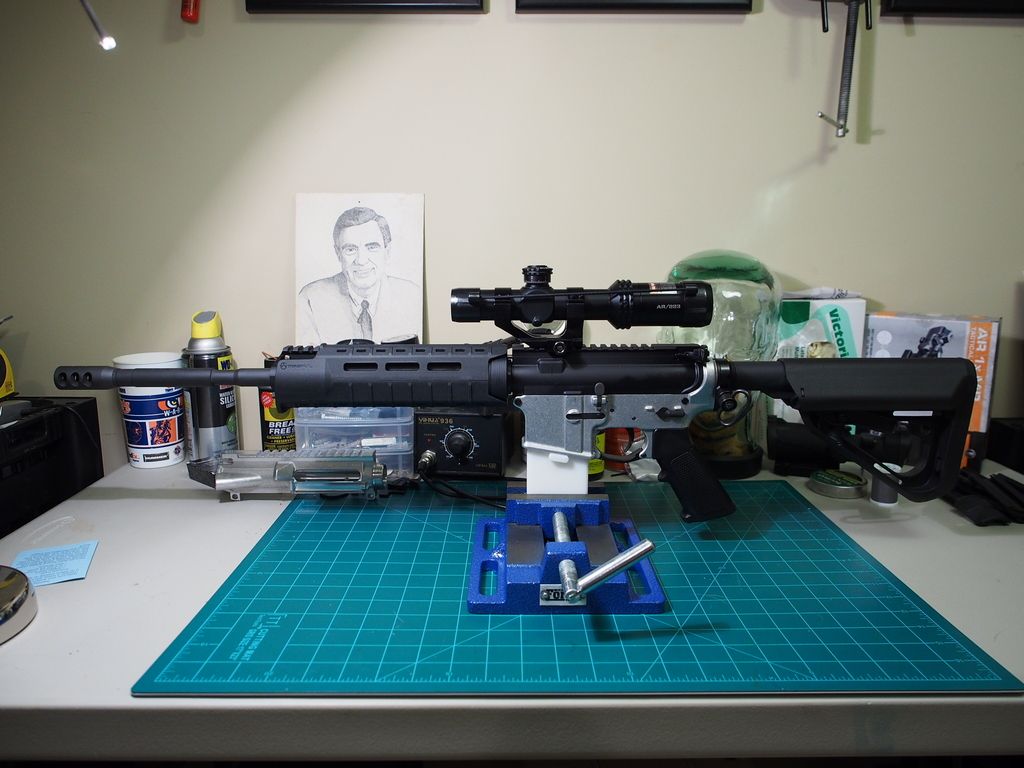
After finishing the trigger slot I was home free. Couple of hits with the drill press and I had a completed lower. I've learned a lot doing my first lower. I expect my next two to be much improved over this first one. It's been a 5 month journey since I started researching my first AR and this lower was past piece of the puzzle and is now complete. I'm glad I spent a little extra on the Easy jig over drill press jigs or settling for a polymer 80% lower. I have zero regrets with my choice of the Easy jig and would choose it again for my 80% build if I had to do it over again. Only way I could improve it I think is if I spent way more money on a mini mill.

Finally built up my lower today (Sans rear takedown pin because I dropped my detent and they make detents out of material that evaporates on contact with the ground). and happy to say everything checks out functionally. Hope to function check my completed rifle this weekend. It's been a fun journey and I've learned a lot.
Starting off with the drilling which should have been the most straight forward and easy part of the process. My handy chart said to use a drill speed of between 2k-3kRPM for aluminum with a 3/8" drill bit. I originally went with 2180 RPM setting on my old Delta 8" benchtop drill press. It's a good 15 years old but looks almost exactly like the current el cheapo 8" benchtop drill press from harbor freight. With a jobbers length 3/8" bit (~5" long) I could not fit the jig on the table and slide it under the bit. Moving the table out of the way my drill press didn't have enough throw to drill the holes deep enough. To get around this I had to move the table out of the way, pick the jig up sliding the drill bit into the hole I want to drill, and slide the table back under the jig. Didn't take too long to realize my little drill press didn't quite have the omph even at 2180 RPM the drill press was noticeably bogging down even with proper lubrication and pecking. I dropped the RPMs to 1630 which slowed my drilling down a bit and the drill press performed much better at those speeds. Good machining practice keeping the chips clear and keeping the drill bit lubed and checking my drill stop collar frequently for slippage found all of the holes drilled in less than 30 minutes and that was taking it slow.
Next came the milling. I had a Blue Hawk (Lowes Brand) el cheapo plunge router that I had bought for $79 *with a router table* for another project. $79 with a router table? Yeah it's a cheap PoS
It looks a lot like the Black and Decker RP250 that 80% arms does not recommend. I'm sure they came out of the same Chinese factory rebadged for Lowes. I figured I would give it a shot and see if it would work. If not I would invest in another router.Don't the look suspiciously alike?
I made a couple of mistakes in the beginning but after about half way through my first lower I found my groove and got into a rhythm. In no particular order, my main mistakes were:
1. Trying to remove too much material. In my excitement of wanting to get this done the first couple of passes I tried to remove "1/3" of the hash mark. I was getting a lot of chatter with that depth of cut. I tried adjusting the router speed up and down but was still getting chatter. 80% arms says to do 1/4 to 1/5 a hash mark per pass. This leads me directly to item number 2.
2. Not using the depth adjustment/measurement tools on my router for a more consistent depth change from pass to pass. Trying to use the included cutting gauge that is built into the jig was pretty difficult when using a plunge router. Trying to hold the gauge pushing down on the plunger to get the depth set consistently... well that was a very inconsistent operation. After a couple of passes I finally wised up, abandoned the depth gauge build into the jig to adjust my cutting depth using it only for periodic sanity checks and started using the depth controls built into my router. I found I could get a really smooth cut when I cut at a depth of 3/64" or less. I found I could actually cut faster using the shallower cut because I didn't have to be as slow or steady when making the pass.
Walls get smoother as I go down the lower.
3. Not cleaning my collet or tightening my collet tight enough. My router has been used on wood projects and has bits of wood dust all over it. I should have cleaned the collet out before I started but I just jammed the end mill (backed it off about 1/4") and started milling. About half way through my 2nd pass the router was really starting to jump a lot. I futzed with the speed (RPMs and the speed I was moving the router) but it was only getting worse and worse. After I finished that pass that's when I noticed my bit had backed out almost 1/4". Then I vacuumed the collet out, blew compressed air in there, and swabbed it with some alcohol soaked Q-tips to pick up all of the fine wood dust. I tightened the crap out of it and didn't have any issues after that.
After bottoming my router on the jig's depth guide I thought I was done. Well it turns out I wasn't.
Jig is bottom out! I'm done!
Wait... it looks like I'm a 32nd out from the 1.249" number. That's not within the 1.249" +/- 0.01" tolerance.
Breaking out the calipers verifies that I'm still outside of tolerance.
I took two more really light ~1/64" passes to sneak up on the 1.249".
Since my lower came with the rear take take down area already milled I didn't bother removing the material between the fire control pocket and the rear take down shelf.
After reading a lot of horror stories on milling out the trigger hole I read over on another site several people having success milling the trigger hole using a different method than the one listed in the instructions for the easy jig. User JAE on the site suggested not drilling the hole for the trigger slot. Instead he bottomed the mill out on the bottom of the lower. Then lowered the end mill just a hair, I did it in 1/64" steps. Then you rest one edge of the router on the work surface and tilt the router down to begin your cutting pass. After tilting the router down your make your pass. It took me 5 passes this way and I ended up with a very clean trigger pocket. I haven't tried it any other way but this way was very easy and made a very nice clean trigger pocket.
After finishing the trigger slot I was home free. Couple of hits with the drill press and I had a completed lower. I've learned a lot doing my first lower. I expect my next two to be much improved over this first one. It's been a 5 month journey since I started researching my first AR and this lower was past piece of the puzzle and is now complete. I'm glad I spent a little extra on the Easy jig over drill press jigs or settling for a polymer 80% lower. I have zero regrets with my choice of the Easy jig and would choose it again for my 80% build if I had to do it over again. Only way I could improve it I think is if I spent way more money on a mini mill.
Finally built up my lower today (Sans rear takedown pin because I dropped my detent and they make detents out of material that evaporates on contact with the ground). and happy to say everything checks out functionally. Hope to function check my completed rifle this weekend. It's been a fun journey and I've learned a lot.


Comment